
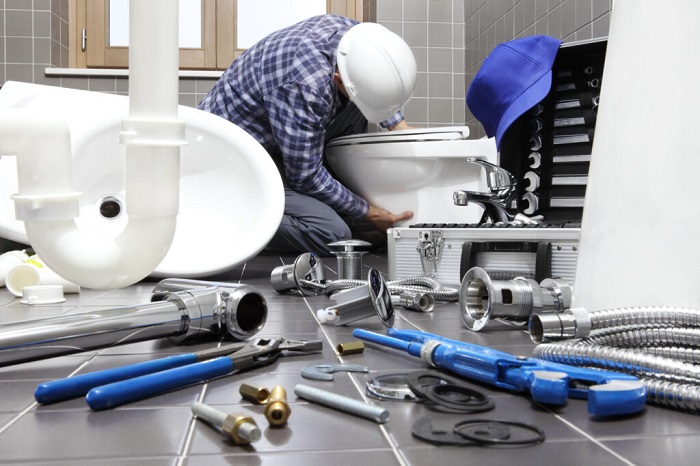

Most bathroom plumbing problems announce themselves quietly before turning into full-blown emergencies. A faint tapping sound in the middle of the night, water lingering around your ankles during a shower, or a toilet that sighs and refills itself every twenty minutes are all warning signs. While complex line breaks and sewer interruptions demand a licensed contractor, a substantial portion of residential bathroom headaches stem from simple mechanical wear and tear. Understanding how these fixtures operate empowers you to tackle common repairs yourself, preserve your home’s structural integrity, and avoid inflated repair bills.
The Constant Dripping Faucet
A faucet dripping at a rate of one drip per second wastes more than three thousand gallons of water over the course of a single year. Beyond the environmental and financial toll, the persistent sound alone is enough to drive any homeowner to distraction.
Faucets rely on internal seals to hold back pressurized water when the handle sits in the off position. Over time, friction, hard water deposits, and material degradation compromise these components.
Identifying the Mechanism and Making the Repair
Before touching any tools, shut off the water supply valves directly beneath the sink. Open the faucet to drain remaining line pressure. The repair process depends on the design of your fixture:
-
Cartridge and Disc Faucets: Most modern single-handle fixtures house an internal plastic or ceramic cartridge. Pry off the decorative handle index, loosen the retaining screw with an Allen wrench, and pull the handle away. Unscrew the retaining nut and lift the cartridge straight out. If mineral build-up is heavy, soak the cartridge in warm white vinegar; if the internal rubber seals or plastic housing are grooved and worn, replace the cartridge with an exact model match.
-
Traditional Compression Faucets: Older dual-handle setups utilize a threaded stem with a rubber washer screwed to the bottom. When the handle turns, the washer presses against a brass valve seat. If water leaks from the spout, remove the stem and replace the hardened neoprene washer. If water seeps around the handle base while the faucet runs, replace the rubber O-ring along the stem body.
The Running Toilet
A toilet that runs continuously can waste up to two hundred gallons of water every day. This problem almost always points to an issue inside the tank rather than the porcelain bowl itself. Inside the tank, a fill valve brings fresh water in, while a rubber flapper holds water back until you press the flush lever.
Diagnosing and Adjusting Tank Components
Remove the tank lid and set it flat on a towel. Observe the water level relative to the open overflow tube in the center. If water spills over the lip of the tube, your fill valve is improperly calibrated or failing to shut off. Turn the adjustment screw on top of the valve clockwise or counterclockwise to lower the float, ensuring the static water level rests approximately one inch below the top of the overflow tube.
If the water level sits well below the overflow tube yet the fill valve continually turns on and off, the toilet is suffering from a phantom flush. Water is slowly leaking from the tank down into the bowl through a damaged flapper seal.
To confirm this, drop ten drops of dark food coloring into the tank and leave the toilet untouched for thirty minutes. If colored water seeps into the bowl without anyone flushing, the seal is broken. Turn off the water supply, flush to empty the tank, unhook the flapper from the ears of the flush valve, and inspect it. Mineral crust or warped rubber prevents a watertight seal. Replacing an old rubber flapper costs only a few dollars and takes five minutes. When installing the replacement, ensure the lift chain has just about a half-inch of slack; a chain that is too tight props the flapper open, while a chain that is too loose gets caught underneath it.
Sluggish Shower and Sink Drains
Bathroom drains endure a continuous slurry of shed hair, viscous liquid soaps, shaving cream, and skin conditioners. Over weeks and months, these substances bind together inside the pipe, narrowing the passage until water barely creeps downward.
Chemical drain cleaners might seem like a quick answer, but they rely on caustic compounds like sodium hydroxide or sulfuric acid. These chemicals generate intense heat that softens PVC pipes, corrodes vintage metal traps, and leaves toxic fumes lingering in enclosed bathrooms. Mechanical extraction is invariably safer and more effective.
Clearing the Blockage Mechanically
Start with a flexible, barbed plastic drain snake. Insert the strip past the pop-up stopper or through the shower grate, twist gently to snag accumulated hair clumps, and pull the obstruction free.
For bathroom sinks where the clog resides deeper down, clear the P-trap directly:
-
Position a small bucket beneath the curved pipe under the sink.
-
Loosen the two slip-joint nuts securing the curved trap bend using slip-joint pliers or by hand if plastic fittings were used.
-
Drop the trap down, dump the trapped wastewater into the bucket, and clear out accumulated debris using an old bottle brush.
-
Check the rubber slip-joint washers for brittleness, replace them if crushed, reassemble the joints hand-tight, and add a quarter-turn with your pliers. Run the faucet at full volume to confirm there are no leaks around the threads.
Low Water Pressure at Specific Fixtures
When a single showerhead or faucet delivers a feeble spray while the rest of the house enjoys strong, robust pressure, the issue is almost never the municipal supply or main regulator. Instead, local mineral scale is choking the fixture’s exit points.
Municipal tap water carries dissolved calcium and magnesium. When water exits an aerator or nozzle, tiny droplets evaporate, leaving behind calcified chalky deposits known as limescale.
Restoring Flow to Aerators and Showerheads
Fixing localized pressure loss requires minimal labor:
-
Faucet Aerators: Wrap a layer of masking tape around the textured tip of the faucet spout to protect the finish. Use pliers to turn the aerator housing counterclockwise. Disassemble the internal mesh screens and rubber ring, noting their order. Clear loose grit under running water, submerge the screens in warm white vinegar for an hour to dissolve limescale, and screw the assembly back into place.
-
Showerheads: If the rubber spray nozzles on your showerhead are clogged, rub your thumb firmly across them while the shower runs to dislodge scale. For severe internal blockages, fill a heavy-duty plastic freezer bag with distilled white vinegar, slip it over the showerhead until the fixture is submerged, and secure it with a sturdy rubber band. After two hours, remove the bag, wipe the faceplate down, and run hot water for two minutes to flush loose particles.
Water Leaking Around the Base of the Toilet
Water pooling on the tile around the base of your toilet requires immediate intervention. Left unaddressed, wastewater will rot the plywood subfloor, ruin the ceiling below, and foster hidden mold growth.
First, wipe the porcelain dry and verify that the puddle is not simple condensation sweating off a cold tank during humid weather, or water dripping down from a loose supply line connection. If the leak consistently appears around the baseboard immediately after flushing, the wax ring sealing the toilet horn to the floor flange has failed.
Wax rings break down when a toilet rocks back and forth. If the closet bolts securing the bowl to the floor loosen, or if the floor underneath is slightly uneven, the shifting weight breaks the wax seal. Tightening the floor bolts can sometimes stop a minor leak, but apply caution: over-tightening porcelain will crack the base instantly, turning a five-dollar gasket replacement into a multi-hundred-dollar fixture replacement.
If the toilet continues to weep water from underneath, the correct repair involves turning off the supply valve, completely siphoning the tank and bowl dry, unbolting the fixture, lifting it aside, and scraping away the remnants of the failed wax. Install a new wax-free rubber seal or an extra-thick reinforced wax ring, set the toilet down squarely, and secure the bolts evenly before restoring water.
Knowing When to Call a Licensed Professional
While clearing an accessible P-trap or swapping a worn cartridge falls well within the domain of DIY maintenance, some scenarios require industrial tooling and professional liability coverage.
Step back and call a licensed plumber if you encounter:
-
Multiple Simultaneous Backups: If using the washing machine causes water to back up into the bathroom shower, or if running the sink makes the toilet bubble aggressively, the blockage sits inside the main sewer lateral or plumbing vent stack, beyond the reach of standard consumer tools.
-
Supply Lines Leaking Inside Finished Walls: Damp drywall, musty wall cavities, or the faint hiss of pressurized water running when all taps are off indicate a pinhole copper leak or failing PEX fitting behind the studs.
-
Persistent Natural Gas or Sewer Odors: While an empty P-trap can occasionally let sewer gas enter a room, persistent odors that do not clear after running water through every drain suggest cracked vent piping inside the walls or broken cleanout plugs.
Attentive homeowners who catch plumbing problems early and understand the mechanics behind their fixtures can easily resolve routine issues, protect their homes from water damage, and keep their plumbing running quietly and efficiently for decades.

Comments are closed.