
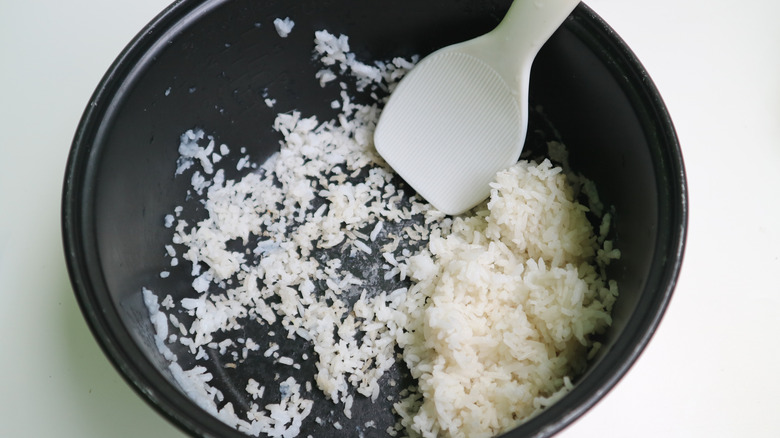

Few kitchen disappointments match the quiet frustration of lifting a rice cooker lid expecting tender, cloud-like grains, only to find a tough, amber-colored crust fused to the bottom of the pot. In Persian, Korean, and Puerto Rican culinary traditions, an intentionally browned bottom—whether known as tahdig, nurungji, or pegao—is celebrated for its nutty crunch. Yet when your goal is soft jasmine, fluffy basmati, or sticky sushi rice for a weeknight dinner, an accidental burned layer feels like a culinary failure that wastes food and makes cleanup miserable.
While many home cooks assume their rice cooker is simply broken or cheap, unexpected scorching is rarely a sign of hardware failure. Instead, it is usually the result of how starch, water, and heat sensors interact during the boiling phase. Understanding how your machine operates, combined with a few fundamental prep adjustments, will eliminate that stubborn charred crust and guarantee evenly cooked rice from the top of the pot to the very bottom.
How Your Rice Cooker Detects Doneness
To fix the burning problem, you first have to understand the thermal physics governing your cooker. Most standard and digital rice cookers rely on a remarkably simple thermodynamic principle: liquid water cannot exceed 212 degrees Fahrenheit (100 degrees Celsius) under normal atmospheric pressure. As long as water is actively boiling inside the bowl, the temperature inside the cooker remains locked at that boiling mark.
Once the expanding rice grains absorb the available water and the excess moisture turns to steam, the temperature at the base begins to rise sharply past 212 degrees. A spring-loaded, magnetic thermal sensor located in the center of the heating base detects this rapid temperature spike. Once the threshold is crossed, the sensor trips a mechanical switch or signals the internal circuit board to drop down to the low-heat “Warm” setting.
Scorching occurs during this critical transition window. If there is a delay between the moment the water disappears and the moment the sensor registers the heat increase, the concentrated heat from the bottom element will begin frying the bottom layer of rice instead of steaming it.
Rinsing Away the Real Culprit: Surface Starch
The single most common cause of scorched rice is not inadequate water or faulty heating, but excessive surface starch. When white rice is milled, polished, packaged, and transported, the grains continuously grind against each other. This friction creates a fine, powdery coating of loose starch (primarily amylose and amylopectin) on the exterior of every grain.
If you pour unwashed rice directly into the cooker, this loose starch instantly dissolves into the cooking water, creating a dense, milky slurry. As the water boils and bubbles up, this heavy starch mixture sinks directly to the hottest zone in the appliance: the bottom of the inner pan. Because the heating plate is applying direct heat, this starch layer gelatinizes into a thick paste that fries and browns long before the liquid above it has fully evaporated.
To stop this from happening, you must rinse your rice thoroughly in cold water before it ever touches the cooker. Place the dry rice into a bowl or fine-mesh colander, fill it with cold tap water, and vigorously swirl the grains with your fingers for ten to fifteen seconds. Pour off the cloudy water and repeat this process three to four times. You do not need the runoff water to be crystal clear, but it should be translucent rather than milky. Getting rid of that free starch allows water to circulate cleanly between the grains, preventing a gummy paste from settling against the metal base.
Calibrating Your Measurements and Ratios
Even a minor shortage of cooking liquid can cause the lower grains to dry out and begin searing while the top grains are still firm. Much of this inconsistency comes down to measuring errors.
The plastic cup included in the box with nearly all Asian and Western rice cookers is not a standard US measuring cup. A standard US cup holds 240 milliliters (8 fluid ounces), whereas the bundled cup is modeled on the traditional Japanese gou, which holds exactly 180 milliliters (roughly three-quarters of a standard cup). If you measure your rice with the manufacturer’s small cup but use a standard kitchen measuring cup for the water, or vice versa, your liquid ratio will be completely unbalanced. Always use the same measuring vessel for both rice and liquid, or rely strictly on the internal water markings stamped inside the bowl.
Different grain profiles also demand distinct hydration levels:
-
Long-grain white varieties (such as Jasmine and Basmati) have firmer starch structures and generally need a liquid-to-rice ratio between 1.25-to-1 and 1.5-to-1.
-
Short-grain white varieties retain moisture more readily and need a tighter 1-to-1 or 1.1-to-1 ratio to avoid turning mushy.
-
Brown and wild rice retain their exterior bran and germ coatings, requiring roughly double the water and extended cooking times.
If your white rice consistently exhibits a dry, browned bottom despite proper washing, increase your liquid volume by two to three tablespoons per cup of dry grain to create an extra moisture buffer.
Inspecting the Cooker Hardware for Thermal Issues
When technique adjustments fail to yield fluffy rice, the physical condition of the appliance itself must be addressed. Complete, unobstructed contact between the bowl and the heating element is required for accurate cooking cycles.
Heating Plate Contamination
Unplug your cooker and remove the inner bowl. Inspect the concave heating plate at the bottom of the housing and the spring-loaded button in the center. Over time, stray grains of uncooked rice, drops of water, or mineral scale can collect on this surface and burn into stubborn black specks.
These dried residues act as thermal insulators. They create microscopic air gaps that cause localized hot spots, which scorch the bottom of your pot while preventing the central temperature sensor from getting an accurate reading. Wipe down the cooled plate with a damp microfiber cloth, and use a non-abrasive scrub pad to lift any baked-on debris.
Warped Bowls and Damaged Coatings
Examine the underside of the inner cooking pot. If the pot has been dropped, washed while still hot, or tapped aggressively against a countertop, the bottom surface can warp slightly. Even a subtle bend will break direct contact with the central sensor, causing the machine to run on high heat far longer than it should.
Similarly, check the condition of the interior nonstick finish. If the nonstick layer is scratched, flaking, or worn thin by metal utensils or abrasive cleaning sponges, the rice will lose its protective barrier. Exposed aluminum pores grab onto starch molecules, turning a light release into permanent scorching.
Managing the “Keep Warm” Cycle and Resting Time
The automated “Keep Warm” setting is designed to hold cooked rice at a food-safe temperature (typically above 140 degrees Fahrenheit) for several hours. Unfortunately, this function is notorious for quietly dehydrating the bottom layer of rice long after the cooking phase has completed.
The warming coil continuously radiates low, dry heat upward through the base of the pot. If the cooked rice sits undisturbed on “Warm” for more than twenty or thirty minutes, that steady heat evaporates the remaining moisture at the bottom of the bowl, slowly toasting the bottom layer into a tough sheet.
To prevent this desiccation, treat the end of the cook cycle as an active step:
-
Shut off or unplug the machine the moment the cooker clicks from “Cook” to “Warm.”
-
Leave the lid closed and let the pot sit completely undisturbed for ten minutes. This resting phase allows the concentrated internal steam to redistribute evenly from top to bottom, softening the grains resting against the metal.
-
Fluff the rice thoroughly with a plastic or wooden paddle. Gently folding the rice from the bottom upward releases trapped pockets of heavy steam and lifts the lower layer off the hot surface.
Using a Protective Fat Barrier
If you are cooking starchy grains or using a machine that runs slightly hot, adding a minimal amount of fat provides immediate insurance against burning.
Swirling half a teaspoon of neutral oil, butter, or toasted sesame oil across the bottom of the pot before adding your washed rice and water creates a slick lipid barrier between the starch and the metal. This thin layer prevents starch molecules from adhering to the surface as water boils away. As an added benefit, fat lowers surface tension in the water, which reduces the starchy foam that often clogs the steam vent on the lid.
Mastering your rice cooker is simply a matter of controlling starch and understanding how your appliance reads heat. By washing away residual surface dust, verifying your water volume, keeping the heating plate clean, and turning off the warming function as soon as the cycle finishes, you can enjoy tender, evenly steamed rice every single time.

Comments are closed.