
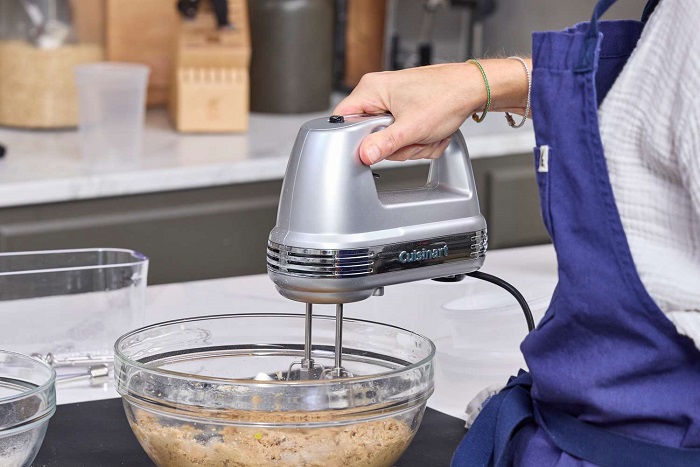

Anyone who has baked a batch of cookies or whipped up a birthday cake knows the familiar sting of the flour plume. You carefully measure your dry ingredients, tip them into the mixing bowl, set your hand mixer into position, and flick the switch to low. In a fraction of a second, an aggressive puff of white powder billows into the air, coating your countertops, your shirt, the backsplash, and the crevices of every nearby appliance.
Beyond the annoyance of scrubbing powdery residue off your cabinets, flour explosions throw off your recipe by ejecting measured ingredients onto the counter rather than leaving them in the batter. Fortunately, stopping this mess does not require buying expensive commercial appliances. By understanding how dry ingredients behave under mechanical agitation and applying a few smart mechanical habits and kitchen hacks, you can keep every gram of flour right where it belongs.
Why Hand Mixers Turn Flour into Dust Clouds
To eliminate the problem, it helps to understand the physics occurring inside your bowl. All-purpose and pastry flours are milled into microscopic particles, typically ranging between one and one hundred microns in size. When flour rests in a dry measuring cup or sits on top of wet ingredients, it traps a considerable volume of air between those microscopic particles.
When you introduce standard beater blades into this airy, low-density powder, several forces collide at once:
The spinning metal tines act like miniature fan blades. Even at a low setting, the blades displace the air sitting inside the bowl, generating an upward updraft. At the same time, centrifugal force catches dry granules and flings them outward against the bowl walls. If the blades hit dry flour before it has had a chance to bind with moisture, that air draft lifts the lightest particles directly into the kitchen atmosphere.
Budget and mid-range hand mixers often exacerbate this issue because their internal motors lack a true low speed. Many budget appliances jump immediately to several hundred revolutions per minute the instant you nudge the power switch, creating an immediate, violent burst of airflow.
The Pre-Mix Habit: Blend Before You Power Up
The most reliable defense against a flour storm requires no special equipment at all—just five seconds of patience before your fingers touch the power switch.
The Unpowered Beater Swirl
Before you turn the mixer on, use the appliance as a manual whisk. Lower the turned-off beaters into the center of the bowl and stir the mixture by hand in four or five wide, circular motions. This simple action forces dry flour down into the butter, milk, or eggs underneath. As soon as the flour granules contact liquid fat or water, surface tension grabs hold of them, dramatically increasing their weight and eliminating their ability to float away on an air current.
The Spatula Pre-Fold
If you are working with a delicate batter or a particularly large ratio of flour to liquid, keep a wide silicone spatula next to your mixing station. When you dump dry ingredients into your creamed mixture, use the spatula to fold the outer edges inward three or four times. You do not need to mix the batter thoroughly at this stage; you simply want to coat the dry surface so that no dry islands of white powder remain exposed to the open air.
Adjusting Your Mechanics: Depth, Angles, and Staging
How you hold and maneuver your hand mixer plays a massive role in whether ingredients stay contained or end up on your ceiling.
Submerge Before Starting
A common mistake is holding the beaters right at the waterline of the batter when sliding the switch to the on position. Always push the beaters completely down to the bottom of the mixing bowl before engaging the motor. Starting the rotation beneath the heavier wet ingredients anchors the blades, allowing the thick base to dampen the initial rotational shockwave.
Add Dry Ingredients in Measured Stages
Dumping four cups of flour into a bowl all at once creates an avalanche of loose powder that even deep bowls struggle to contain. Divide your dry additions into two or three smaller batches. Mixing smaller increments allows the wet batter to absorb each addition almost instantly, ensuring there is never enough loose flour resting on top to form a cloud.
Feather the Speed Switch
If your mixer does not have an electronic gradual-start feature, mimic one manually. Instead of sliding the switch into a locked position immediately, toggle the switch on and off in half-second pulses. These brief micro-bursts nudge the beaters into motion, gradually incorporating the flour into the batter without giving the motor enough continuous momentum to kick up a persistent draft. Once the powder has turned into a shaggy dough or cohesive paste, you can switch the mixer to continuous running mode.
Kitchen Hacks and Temporary Splatter Shields
When you are working with large-volume recipes or ultra-light powders like confectioners sugar and cocoa powder—which are even lighter and more volatile than wheat flour—physical shields offer foolproof protection.
The Paper Plate Collar
One of the oldest and most effective baker tricks involves an ordinary, inexpensive paper plate:
Take a standard paper plate, flip it upside down, and use the stem of your beaters to punch two holes through the center, spaced roughly an inch apart. Slide the beater shafts through the holes from underneath, then click the beaters into your hand mixer housing.
The paper plate sits directly above the beaters like an umbrella. When you lower the beaters into the bowl, the plate rests over the rim, completely blocking escaping particles while still allowing you full freedom to move the mixer around the bowl. When you finish mixing, simply toss the paper plate into the compost or recycling bin.
The Damp Tea Towel Drape
If you do not have paper plates on hand, grab a clean, lightweight kitchen towel or tea towel and lightly dampen it with water. Drape the towel over the top of the bowl, leaving just enough of a gap on one side to insert your hand and the mixer beaters. The damp fibers capture any stray flour particles that attempt to float upward, keeping your counters spotless. Just be mindful to keep the loose edges of the towel held away from the spinning shafts so the fabric cannot snag in the beaters.
Choosing the Right Bowl Geometry
The vessel you mix in matters just as much as your technique. Wide, shallow glass or ceramic bowls look beautiful on kitchen displays, but their low, sloping sides provide a natural launch ramp for flying powders.
For mechanical mixing, choose deep bowls with straight, high vertical walls. Stainless steel mixing bowls with rubberized non-slip bottoms are ideal for this task. The steep vertical walls redirect displaced flour back downward toward the center of the bowl rather than allowing it to glide up and over the rim. The added depth also gives you ample vertical clearance, allowing you to submerge the beaters deeply while keeping the mixer head comfortably above the mess zone.
By combining deep vertical bowls, staging your flour in smaller batches, and giving the mixture a quick manual stir before flicking the power switch, you can eliminate messy baking cleanups entirely and keep your kitchen running smoothly.

Comments are closed.